

Cladding Trims and Seals: A Complete Bathroom Buying Guide
Written by Bathroom Republic's Team · 12-minute read
Bathroom wall panels can cover most of the visible surface. But smaller finishing parts often decide how neat and complete the installation looks.
Cladding trims help finish corners, joints, exposed edges and transitions between surfaces. Suitable seals and sealants help protect vulnerable points where moisture could otherwise find its way behind the panels.
Choosing the correct profiles before installation can make fitting easier and reduce the need for improvised finishing work. This guide explains the main types of cladding trims and seals, how to match them to your panels and what to check before ordering.

Before you order
- Confirm the thickness of your wall or ceiling panels.
- Map every internal corner, external corner, straight join and exposed edge.
- Check the recommended adhesive and sealing method for the complete panel system.
What Are Cladding Trims and Seals?
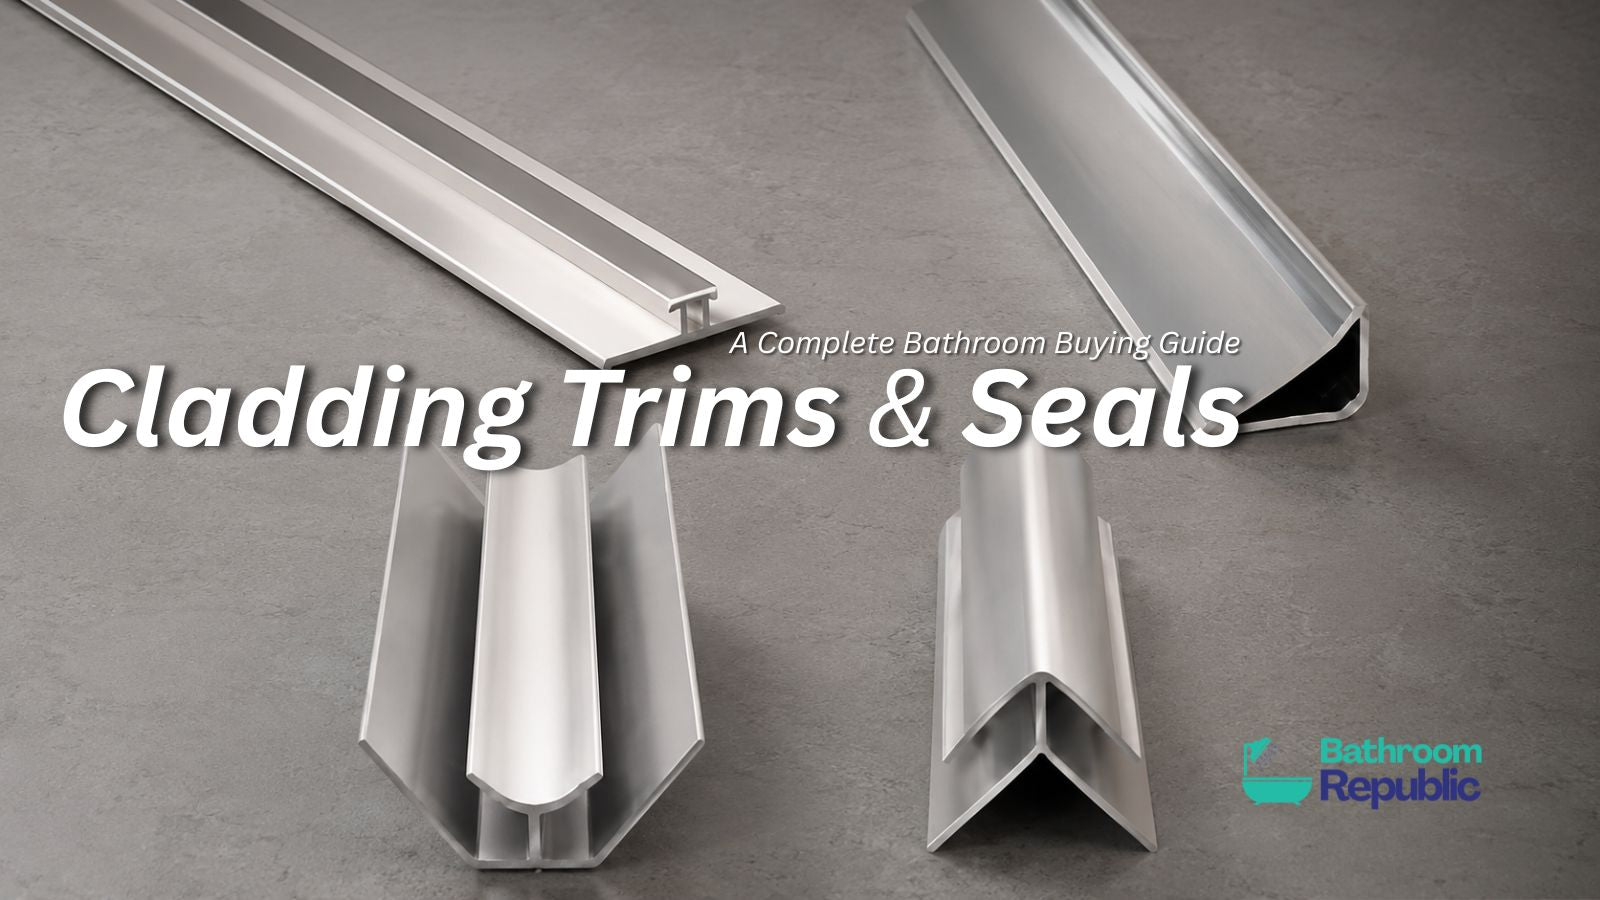
Cladding trims are profiles fitted around or between wall and ceiling panels. Depending on the trim, they can cover a cut edge, join two panels, finish a corner or create a transition where the cladding meets another surface.
Common profiles include:
- Internal corner trims
- External corner trims
- H-joint or joining trims
- Starter and end trims
- Base seal trims
- Cove or top corner trims
- L-shaped finishing trims
Sealing is the process of closing joints, cut-outs, and perimeter gaps. Use the system recommended for the selected panels. This may include a purpose-designed trim, a suitable sanitary sealant, or both.
A trim can improve how a joint looks, but it is not a replacement for proper sealing. The full installation must follow the panel and trim maker’s instructions, especially in showers and other wet areas.
Explore Bathroom Republic’s cladding trims and seals to compare profiles for different panel thicknesses, corners and joins.
Why Are the Correct Trims Important?
Cut PVC panel edges can look unfinished when left exposed. They may also be more vulnerable to knocks, dirt and moisture than the decorative face of the panel.
The right trim helps by:
- Covering visible cut edges
- Creating straighter-looking corners
- Joining panels where a continuous run is not possible
- Producing a cleaner transition between walls and ceilings
- Supporting the sealing strategy around wet areas
- Coordinating the installation with other bathroom finishes
Planning the trims before cutting the first panel is important. Some profiles receive the panel edge during installation, meaning they cannot be added neatly after every panel has already been bonded to the wall.
Which Type of Cladding Trim Do You Need?
Internal Corner Trims
An internal corner is created where two walls meet and form an inward-facing angle. Internal corner trims receive or cover the edges of the adjoining panels, helping create a consistent finish through the corner.
They are commonly used:
- Inside shower enclosures
- Around baths
- Where two fully clad bathroom walls meet
- Inside alcoves and recessed areas
Internal corners in wet areas need careful sealing. Walls are not always perfectly square, so dry-fitting the panels and trim before applying adhesive can reveal where adjustments are required.
External Corner Trims
External corner trims finish outward-facing corners, such as the edge of boxed pipework, a partition wall or a boxed-in concealed cistern.
These corners are exposed to everyday contact, so a trim can help protect the panel edges while creating a straighter visual line. Check whether the profile is designed to receive the panel during fitting or cover the corner after the panels are in position.
H-Joint Trims
An H-joint trim joins two panels along a straight line. It can be useful where the wall is wider or taller than a single panel, or where the installation design requires a controlled break between boards.
The joint should be positioned deliberately. On a feature wall, a centred or symmetrical join will normally appear more considered than a narrow panel inserted at one side.
Measure the usable panel width as well as the wall width when planning the layout. Joint profiles take up a small amount of space, and this should be included in the cutting plan.
Starter and End Trims
Starter and end trims provide a finished edge where cladding begins or stops. They may be used beside a door frame, at the end of a feature wall or where panels meet a different wall finish.
These profiles are particularly helpful when the panel’s internal structure would otherwise remain visible at the edge.
Base Seal Trims
A base seal trim is fitted where the bottom of a wall panel meets another surface, such as a shower tray or bath edge. Its purpose is to create a neat transition and support the sealing of this vulnerable junction.
The precise installation sequence varies between systems. Confirm whether the panel sits inside the trim, behind it or above it before cutting the board.
Cove and Top Corner Trims
Cove or top corner trims help finish the transition between wall and ceiling panels. They can conceal small perimeter gaps and create a more continuous appearance around the room.
These trims are especially relevant when coordinating wall panels with Bathroom Republic’s bathroom ceiling cladding.
L-Shaped Trims
An L-shaped trim is a versatile finishing profile that can cover exposed edges and some external corners. Because designs vary, check the profile dimensions and intended fitting method rather than relying on the name alone.

Match the Trim to the Panel Thickness
One of the most important checks is whether the trim fits the thickness of the selected panel.
Bathroom Republic panels and trims are available in sizes designed for panel thicknesses such as 5mm, 6mm and 10mm. A trim intended for a 5mm panel may not accept a 10mm board, while an oversized channel may leave a thinner panel loose or poorly supported.
Panel-thickness check
Before ordering, confirm:
- The actual panel thickness
- The trim’s internal channel size
- Whether the profile is universal or thickness-specific
- Whether adjoining panels have the same thickness
- How much adhesive and wall preparation may affect the finished position
Bathroom Republic’s cladding by thickness collection can help you compare 5mm, 6mm and 10mm panel options before selecting matching trims.
Browse Cladding Trims and Seals
Choose Trims for the Correct Panel Location
Not every wall panel is intended for the same level of moisture exposure. The panel, trims, adhesive and sealing method should all be suitable for the intended location.
General Bathroom Walls
For areas outside the direct shower spray, bathroom wall panels can provide a coordinated decorative surface around basins, baths and other parts of the room.
Trims can finish the panel edges around doors, furniture, mirrors and transitions to painted walls. Any areas exposed to regular splashing still require appropriate sealing.
Shower Enclosures and Wet Areas
Wet-area reminder: Panels used inside a shower enclosure must be suitable for continuous wet-area use. All corners, joints, cut-outs and perimeter edges should be installed and sealed according to the specified panel system.
Browse Bathroom Republic’s shower wall panels when planning walls exposed directly to shower spray.
If the project includes a walk-in layout, plan the cladding around the position of the wet-room screen. Wall profiles, support bars and panel penetrations should be considered before the cladding is fitted.
Shower-Over-Bath Installations
Cladding around a shower bath needs careful attention where the panels meet the bath rim and screen profile. Water can collect at these junctions if the layout and sealing are poorly planned.
Choose the screen before completing the wall-panel layout so its fixing profile can be positioned against a suitable surface. Bathroom Republic’s bath screens include fixed, hinged and folding arrangements for different bathroom layouts.
Do You Need Cladding Adhesive as Well?
Trims finish and join the panels, but they do not normally provide the main bond between the cladding and the wall. A suitable adhesive is used to secure panels to the prepared surface.
The wall should be sound, stable and suitable for the selected installation method. If fitting over existing tiles, check that the tiles are firmly bonded and that the panel manufacturer permits this application.
Use an adhesive compatible with the panel material and intended environment. Bathroom Republic’s cladding adhesive collection provides an appropriate starting point when planning the complete installation.
Do not assume that more adhesive will correct a severely uneven or unstable wall. Significant surface defects should be addressed before the panels are installed.
How to Plan the Trim Layout
- Measure every wall. Record the height, width, corners, openings and pipe penetrations.
- Select the panels. Confirm their dimensions, orientation and thickness.
- Draw the panel layout. Decide where full panels, cut panels and joints will sit.
- Mark every internal corner. Count the full vertical length required.
- Mark every external corner. Include boxed pipework, partitions and concealed-cistern boxing.
- Identify exposed ends. Add starter or end trims where the cladding stops.
- Plan straight joins. Add H-joint trims where panels meet across a flat surface.
- Plan top and base transitions. Include suitable profiles where walls meet ceilings, baths or shower trays.
- Check trim lengths. Compare the required runs with the length of each trim.
- Allow for cutting waste. Add a sensible margin for mitres, offcuts and accidental damage.
Planning tip: Buying the panels first and considering the trims later can delay the project. Plan both together so the thickness, colour and profile type are coordinated.

Choosing White, Chrome or Silver Trims
The trim colour affects how visible the panel joints and edges become.
White Trims
White trims can blend naturally with white, pale marble and light stone-effect panels. They are useful when you want corners and joints to remain visually understated.
Chrome or Silver Trims
Chrome and silver trims can create a deliberate border around the panels. They may coordinate with chrome taps, shower fittings, enclosure profiles and other metallic bathroom details.
Consider the entire room rather than matching the trim to one product in isolation. Repeating a finish through a few key elements can make the design feel more consistent.
Contrasting Trims
A contrasting profile can emphasise the shape of a feature wall or boxed section. This works best when the lines are straight and the trim positions have been planned symmetrically.
For a coordinated room, compare the wall finish with Bathroom Republic’s bathroom flooring range before finalising the panel and trim colours.

Common Cladding Trim and Sealing Mistakes
Ordering the Wrong Trim Thickness
Always match the trim channel to the actual panel thickness. Do not rely on photographs or assume that every PVC profile is universal.
Forgetting Trims Until Installation Day
Some trims need to be positioned before or during panel fitting. Trying to add them afterwards may result in visible gaps or unnecessary dismantling.
Assuming the Trim Makes the Joint Waterproof
A neat profile does not guarantee a watertight installation. Use the complete sealing method required by the panel system.
Leaving Cut-Outs Unsealed
Openings around shower valves, pipes and fittings require careful cutting and sealing. Oversized holes can be difficult to finish neatly and may allow moisture behind the panel.
Installing Over an Unstable Surface
Loose tiles, damaged plaster, and dirty walls can weaken the adhesive bond. Prepare the surface properly before fitting the panels.
Blocking Future Maintenance Access
Do not permanently clad over components that may need inspection or servicing without providing appropriate access.
How to Care for Cladding Trims and Seals
Clean panels and trims with a soft cloth and products suitable for their finish. Abrasive pads may scratch PVC or decorative metallic surfaces.
Periodically inspect:
- Internal shower corners
- The joint between panels and the shower tray
- The seal around baths and bath screens
- Pipe and valve penetrations
- Panel edges near the floor
- Areas where sealant has lifted, split or discoloured
Address failed seals promptly. Simply applying fresh material over a loose or contaminated seal may not provide a durable repair; the affected area usually needs appropriate preparation first.
Frequently Asked Questions
Do bathroom wall panels need trims?
Many installations need trims to finish corners, joins and exposed edges. The precise profiles required depend on the room layout, panel design and fitting system.
What size trim do I need for 10mm wall panels?
Choose a trim specifically designed to accept a 10mm panel unless the manufacturer states that the profile is universal. Check the internal channel measurement before ordering.
What is an H-joint trim used for?
An H-joint trim connects two panels along a straight wall or ceiling. It creates a controlled joint where one panel ends and another begins.
What trim should I use for an internal bathroom corner?
Use an internal corner profile compatible with the panel thickness and installation system. Wet-area corners must also be sealed as directed by the panel manufacturer.
Can I use an external corner trim around boxed pipes?
Yes, provided the trim fits the selected panel and is suitable for the corner design. Measure all sides of the boxing before cutting the panels and profiles.
Do trims replace silicone sealant?
Not necessarily. A trim finishes or supports a joint, while an appropriate sealant may still be required to prevent moisture entering around edges, corners and cut-outs. Follow the instructions for the complete panel system.
Can shower wall panels be fitted over tiles?
Some panel systems can be fitted over existing tiles when the surface is sound, secure and suitably prepared. Confirm that the panel and adhesive manufacturers permit it before installation.
Should cladding trims match the wall panels?
They can blend with the panels or coordinate with metallic bathroom fittings. The best choice depends on whether you want the panel edges to disappear or become a deliberate design feature.
How much extra trim should I order?
Calculate every required length and add a sensible allowance for cuts, mitres and mistakes. The appropriate margin depends on the complexity of the room and the lengths in which the trims are supplied.
Complete Your Wall Panel Installation
Cladding trims and seals may be small components, but they play an important role in the appearance and completion of a bathroom wall-panel project.
Choose the panels first, confirm their thickness and map every corner, joint and exposed edge before ordering the profiles. Plan the adhesive and sealing method at the same time, particularly around showers, baths and pipe penetrations.
Browse Bathroom Republic’s cladding trims and seals and check the measurements of each profile against your selected panels before installation.
Have you shopped with Bathroom Republic?
We would love to hear about your experience. Your feedback helps us improve and helps other customers make informed choices.
Author: Bathroom Republic's Team